Firing Electric Kilns: Manual and Digital Controls
This guide covers how to fire a kiln, including both manual kilns (with Kiln Sitters) and electronically controlled kilns, for bisque and glaze firings.
Further down, you’ll find useful firing tips based on common mistakes we’ve learned to avoid through years of experience with electric kilns.
In Appendix C, we’ve also included a sample report prepared for a local school, highlighting key considerations and potential issues when designing a kiln room.
A. Three ways to fire an electric kiln (Oxidation).
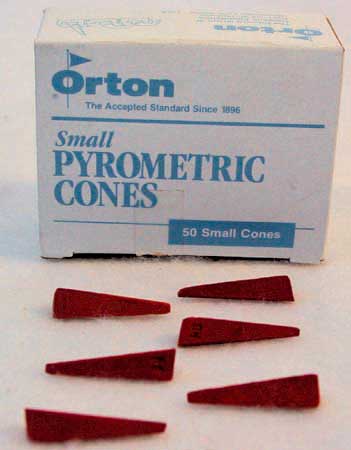
1. KILN SITTER: Turning the kiln on and off using Orton small Pyrometric witness cones in the kiln sitter. When kiln temperature reaches cone's specified temperature, it will melt and will trigger the kiln to turn off (see APPENDIX A for more information about cones).
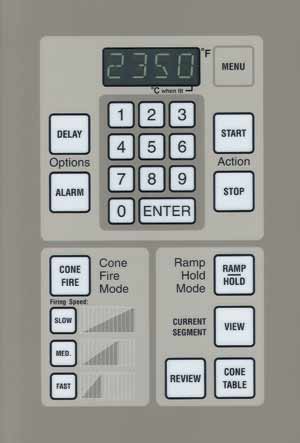
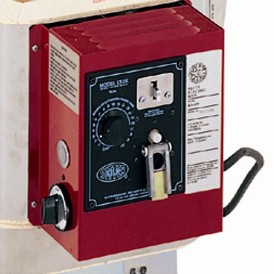
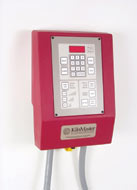
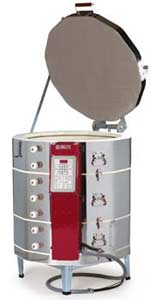
Electric kiln panel |
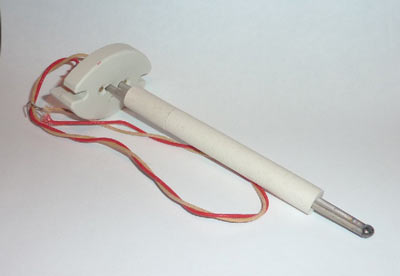
Electric kiln thermocouple |
In order to address these different firing types, we will quickly review how a kiln sitter works, and how an electronic controller works.
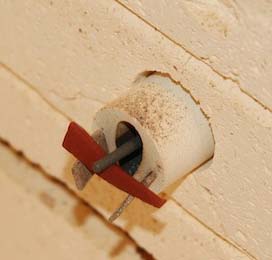
1) KILN SITTER
A kiln sitter works as follows: A junior or small cone of the appropriate cone number is set inside the kiln sitter box. The cone is held by a retaining bar and a moving rod. When the cone bends (because it has absorbed the correct amount of heat), the rod falls. The rod activates the control mechanism which turns off the current to the coils.
Tips:
* Since a kiln sitter works by gravity, it is important for the kiln to be level.
* Kiln sitters can drift and need to be calibrated periodically (more about this later).
* People often find that they need to put a slightly higher cone number in the kiln sitter to get the kiln to fire to the correct temperature. For example, to achieve a cone 6 inside the kiln, they must use a cone 7 in the kiln sitter. You will need to experiment with this for your individual kiln. The firing log will assist you.
* Note that a kiln sitter does not assist in turning up the kiln, just in turning it off.
* A little kiln wash dabbed on the top of new cone support greatly reduces the chance of a cone sticking to the new metal (which may cause your kiln to over or under fire)
3) ELECTRONIC COMPUTERIZED CONTROLLER
An electronic controller turns up the kiln, and also turns off the kiln. It can even be used to do a controlled cool down. You can use a pre-programmed Cone Fire mode, or program your own individual segments. The pre-programmed modes automatically turn the kiln up when it is safe to fire the pieces quickly, and down when the clay is at a point where it should be fired slowly. To determine when to turn the kiln off, the controller uses temperature charts to approximate when the appropriate heat work is done (a certain cone level is reached.) This can vary somewhat based on things such as the density of the load being fired. So it is still important to monitor your firings at least periodically by using witness cones inside the kiln until you trust the performance of the kiln. You will learn whether you need to make adjustments to achieve the desired cone.
Tip:
Some people wonder if it is ok to fire a kiln in cold weather. It is, but Skutt in particular recommends warming the controller (if you have one) to at least 40 degrees F with a space heater or hair dryer. Your kiln will have to work a little longer to get to temperature. Not preheating the controller might bind the relays contacts, thus, overheating your kiln or keeping one of the elements turned on after the kiln automatically turned off.
SELECTING AND MAINTAINING KILN SHELVES
Selecting the proper kiln shelves for your firing application important. Selecting the wrong shelves can be more costly than you need or cutting corners can end up with ruined shelves. When selecting shelves you will have three important choices: a) the material from which the kiln shelves are made, b) the thickness of the shelf, c) half size or full size shelves. To select the right kiln shelves you need to take into account your kiln type and style, firing temperature, firing type (e.g., oxidation, reduction, raku), glazing style used, firing frequency, ware weight and your strength. Once kiln shelves are selected and used, regular maintenance is required (kiln wash and reversing shelves).
More detailed tutorial about kiln shelves and maintenance
BISQUE FIRING
For a bisque fire in particular, you need to drive off the water and humidity that are in the pot. If you fire too fast and the clay is even slightly damp, the steam will cause the piece to explode. (This is true even if the piece is very dry, because there is still moisture inside the clay molecules.) So it is important to fire bisque slowly.
If your pieces are not completely dry and you have damp clay, you may want to candle them first. Candling is done on a manual kiln by turning the bottom switch on low and holding it there for several hours (8-10). With an electronic kiln, you would program the kiln to remain at around 180 degrees F for 8-10 hours. Through the years, at Lakeside Pottery, we learned Candling eliminated all breakage even with thicker pieces. Candling becomes more important when several potters or students ware is fired and pots with varied clay thickness' are in the kiln. We do it even when we are sure the greenware is completely dry - this has eliminated all bisque accidents for several years now.
Important Note: Using the Candling feature in a computerized kiln will reduce life expectancy of the relays. To keep the kiln at 180 degree F for several hours will activate and deactivate the relays hundreds of times. If your kiln has mercury or Solid State relay, candling will have very little effect or effect at all to the relays longevity.
-------------------------------------------------------------
Expediting Drying -- If pots are *damp or slightly wet, sometimes it is ok to expedite the drying by using a fan, warm kiln room or candling in the kiln. Generally, when candling in a computerized kiln going from ambient room temperature to 180 degree F, the temperature rise is slow and it takes approximately 2 hours to get there allowing the last minimal shrinkage and evaporation of the remaining water to occur gradually and slowly.
If *damp pots are placed in the kiln room when the room is not too hot and the kiln room temperature rise is slow, it will have a similar beneficial effect as candling. However, if you place damp pots in the kiln room when the room is already hot, the rapid temperature change will cause rapid drying and shrinkage which can place your pots at risk of cracking.
Using a fan to move some air in the drying area where you have *damp pots can work if the air movement is not too strong and not aimed directly on the pots. It is beneficial if pots are repositioned every so often to make sure that all sides are drying evenly.
* "Damp" is referred to when the clay is almost dry but has slight signs of wetness. At this stage, most of the drying shrinkage has occurred and the clay does not have much remaining movement. Thus, it makes it relatively safe to expedite completion of the last bit of drying. The only exceptions are large forms, in particular flat forms, and pots with walls that are thicker than 1/2".
---------------------------------------------------------------
From there, the kiln is slowly turned up. You can read Clay drying and firing to remind yourself about the various stages clay goes through and the critical temperatures to watch out for.
This is a typical firing schedule for a bisque firing in a manual kiln.
Bottom switch on low for several hours if necessary (candling).
Turn on all switches to low for 3-4 hours.
Turn all switches to medium for 3-4 hours.
Turn all switches to high until kiln has reached temperature.
(Note, if your kiln has multiple sections, you may turn them up individually if you want slower heating.)
See another manual firing example in APPENDIX B
his is a typical firing schedule for a bisque firing in Skutt electronic controller for SLOW setting, Cone 04.
Segment 1: 80 degrees / hour to 250 degrees F
Segment 2: 250 degrees / hour to 1000 degrees F
Segment 3: 150 degrees / hour to 1300 degrees F
Segment 4: 180 degrees / hour to 1685 degrees F
Segment 5: 80 degrees / hour to 1928 degrees F.
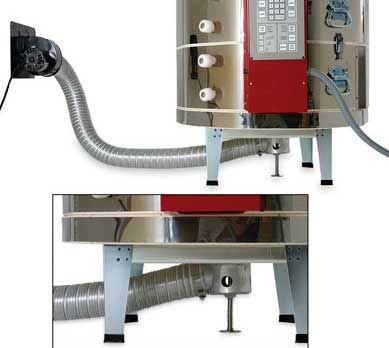
When you are firing bisque, it is very important that the steam has a way to escape. If you are firing with a kiln down-draft-vent, the moisture can escape. If you don't have a vent, you must prop the lid open a few inches (with a kiln brick or similar item) during candling and the first few hours of firing. Usually the upper peep hole plug is also removed during this time (The kiln lid is closed). The top peep hole plug remains out during the firing.
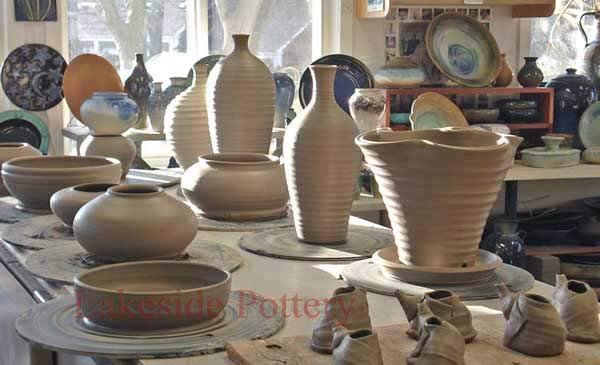
Bisque firing process at Lakeside Pottery - cone 06
a) kiln lid closed and kiln vent is on
b) preheat (automatically set by Skutt kilns in newer models to 180 degree F) to 180 degree for 8-10 hours
c) select cone 06
d) select SLOW firing option
e) to speed cooling (when must need the kiln quicker for the next load), when kiln is cooled to 1000 degree F (see safety information below), lift lid open to about 1". When kiln at 600 degree F, lift the lid open to about 3". When kiln reached 300 degree F, you lift lid up completely (remember, this speed cooling is for bisque firing only)
Tips:
* You may want to read Choosing a Bisque Temperature.
* Some people leave all the peep hole plugs out during the early stages of firing. Skutt advises against this, saying that having multiple plugs open creates a strong convection "jet-draft" which can easily fracture ware and chill the cones in the kiln. Check your manual, and experiment.
* Generally, don't open the kiln completely until the kiln temperature is below 150-250 degrees F, or thermal shock may hurt the pots and/or the kiln elements. You should be able to touch the pieces before you unload them.
* It almost never hurts to fire a bisque kiln slower rather than faster.
GLAZE FIRING
* Glaze firings can be faster than bisque firings, because most of the water has already been driven out of the clay. Some glazes will look better when fired fast, and some when fired slow. This requires experimentation. If unsure, start with slow firing in particular if the glazed pots were recently glazed and are still wet.
* As in bisque firing, if you do not have a kiln vent, the kiln lid should be propped for the first few hours, or until the kiln reaches 1000 degrees F. In addition the top peep hole plug stays open during the whole firing. (These steps are both unnecessary if firing with a kiln vent).
* Mid to High fire glazes often look better if they are cooled slowly. For this reason 3" brick is preferable for high firing. However, it is possible to slow down the cooling by "firing down". With a manual kiln, when you would normally turn the kiln off, instead turn the switches down to medium. With an electronic kiln, you will want to program this ahead of time. As an example, your last segments could allow rapid cooling to 1950 degrees F, a 30 minute hold at that temperature, then slow cooling at a rate of 150 degrees per hour down to 1100 degrees F. At that point the kiln would turn off.
* Having a soak (also called holding temperature or holdup time) can be very useful at the end of firing. A soak may last from 15 minutes to an hour or more. This helps even out the temperatures throughout the kiln, and ensure all the pieces have achieved the right temperature. This is particularly useful if the kiln is densely packed. Soaking for too long can overfire ware, so this must be taken into account (glazes might run and end up on the kiln shelves).
* If something happens to stop the firing early, such as a power failure, you can simply restart the kiln. If using cones, they will continue to absorb heat and will still fall at approximately the correct temperature. With an electronic kiln, the results will also be close unless the kiln has shut off during the final hour or two of firing. This is because most of the heat work happens during that time. If the kiln shuts off toward the very end of firing, you should look at your witness cones to determine when to turn the kiln off.
IMPORTANT: The above is true with bisque firing. It is also true with glaze firing if the power failure occurred early on in the firing cycle. If the power failure occurs in the last 1/3 of the firing temperature, glazing results will change (too runny, crackling effects, possibly damaged pots due to "refiring" effect)
Glaze firing process at Lakeside Pottery - cone 6
a) kiln lid closed and kiln vent is on
b) preheat (automatically set by Skutt kilns in newer models to 180 degree F) to 180 degree for 1 hour if pots are still wet from recent glazing
c) select cone 6
d) select MEDIUM firing option
e) set HOLDUP time to 15 minutes
f) when kiln temperature is 150 degrees or lower, open kiln lid
Firing glass with clay tips
About our kilns, review and comments:
We are using or have used Skutt's KM1027-3, KM 1227-3 and KM1231PK kilns with APM elements (long life) and have recommended these same kilns to several schools and individuals due to our great experience with quality, reliability and great service (even long after the warranty has expired). About Skutt Kilns models and technical information. Skutt also have a program where you enter your needs and it selects the right kiln for your needs based on your requirement, visit "Selecting a Kiln" tool if you are not sure which kiln is right for you.
Kiln Kiln Accessories and Repair Parts:
If you are qualified to repair your kiln, original parts can purchased from your supplier but also can be purchased from www.euclids.com
Euclid design, manufacture and sales, kilns, kiln elements for all kilns or special requirements, kiln accessories, parts and instruments.
SAFETY
* Make sure your kiln room is in compliance with the manufacturer's "fire proof" requirements. See APPENDIX C below as an example of issues to consider when designing a kiln room
* If the kiln room does not have proper ventilation, the room can get dangerously hot. To prevent from forgetting to turn the vent on, have a disconnect switch box that with one action, it connects the power to the kiln, the power to the kiln vent (115 volt) and the power to the room vent. Meaning, the kiln will not run if both fans are not on.
* You should not be near the kiln while it is firing, especially toward the end when you want to make sure it goes off on schedule. If you have to be near the kiln while it is on or cooling, use gloves. The outside sheet metal of the kiln could be hot enough to hurt you.
* A limit timer is a safety device which is set to turn the kiln off after an amount of time that you set. For example, if you expect your firing to last 8 hours, you may set the limit timer to 10 hours. At 10 hours the kiln will turn off. This can prevent a major catastrophe if the kiln sitter or electronic controller fails.
* Wear dark glasses with UV protection when looking into a hot kiln
* Make sure kiln is OFF when opening kiln's lid. In a computerized kiln, it is easy to think it is off when the kiln is cycling on and off (in particular when pre heating (candling). The elements, can burn you but also can electrocute you!
KILN & KILN ROOM VENTING ARE IMPORTANT
Chlorine, fluorine, sulfur dioxide, nitrogen dioxide, and ozone are highly toxic by inhalation. Bisque firings of high-sulfur clay causes the production of great amounts of choking sulfur dioxide. Other large acute exposures to gases are not common. Inhalation of large amounts of these gases can result in severe acute or chronic lung problems. Long-term inhalation of low levels of these gases can cause chronic bronchitis and emphysema. Fluorine gas can also cause bone and teeth problems.
Many metal fumes generated at high temperatures are highly toxic by inhalation. Since lead vaporizes at a relatively low temperature, it is especially hazardous.
Carbon monoxide from fuel-fired kilns or the combustion of organic matter in clays is highly toxic by inhalation and can cause oxygen starvation. One symptom of carbon monoxide poisoning is an intense frontal headache, unrelievable by analgesics.
Hot kilns produce infrared radiation, which is hazardous to the eyes. There have been reports of cataracts, from years of looking inside the hot kilns.
GENERAL FIRING TIPS:
* The worst thing you can do is fire low fire clay or glazes at high fire. The clay and/or glaze will melt all over your kiln and can cause major damage! If you have both low fire and high fire materials in your studio, you might want to mark your pieces differently.
* Use witness cones in the kiln even if you have an electronic controller or kiln sitter periodically. This will show you the Cone that was actually reached inside the kiln where it matters.
* Do not mix bisque and glaze firing in one kiln load (assuming you fire both at the temperature, e.g., cone 06) for the following reasons: a) the bisque gases will contaminate the glazes and produce symptoms such as blisters, b) if one bisque item blows up, the little pieces will ruin several glazed pots and c) even if both firings are set up to the same temperature, the firing schedule between bisque and glaze firing is different as you read above.
* Use kiln wash on top of all kiln shelves. Apply three coats and allow each coat to dry before applying the next coat. Do not fire the shelves unless the kiln wash is completely dry. Kiln wash will peel off if heated in the kiln before completely dry and will contaminate glaze pots with kilnwash flakes. Never apply kiln wash on the bottom or on the side of the kiln shelves
* When loading a glaze kiln, do not place kiln shelves too close over glazed pots below the shelf. Remember that some glazes bubble during the firing and might reach the shelf above.
* Do not open kiln lid (glaze firing) prior to shutting off kiln vent. If kiln is still hot, the kiln vent will pull cold air through the kiln and may crack some pots (in particular larger flat forms)
* If taking a "quick look" inside the kiln when temperature is above 350 degrees F - do it really quickly and again, remember to turn off kiln vent prior to lifting the lid. Also note that glaze colors might not be true at temperatures above 350 degrees F so do not panic if you do not see the expected results.
* If you do not have a computerized kiln controller, purchase one (you can add wall mount controller to the a manual kiln) - it will save you a lot of time and your pots will look much better when able to control temperature rise and hold up time accurately. It will also save on your electric bill (less over shoot and accurate duty cycle).
* Avoid using stilts in particular with high firing where the pots shrink much more. You may think that the pot stands stable on a stilt but as the pot shrinks through the high firing (cone 4-10), the pot could lose it's center on the stilts and will tilt onto the pot next to it.
* Using Skutt kilns for years, we learned to trust it and therefore stopped using witness cones to verify the firing accuracy - it always has been accurate with over 150 firings per year per kiln.
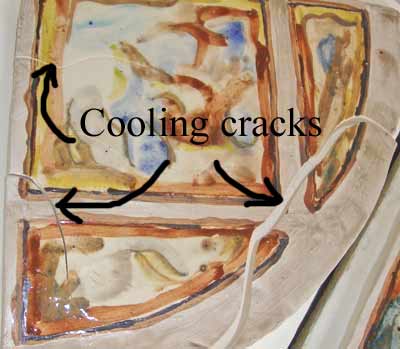
* Use of thicker kiln shelves will minimize shelf warping and increase cooling time thus, less cooling cracks on your pots (mainly flat forms). The reduction in warpage will also save you from flipping shelves too often, thus, reducing kilnwash grinding frequency (tedious and dirty job).
* Use half kiln shelves - they are lighter and will give you more flexibility loading the kiln more efficiently.
* If you plan to fire the kiln many times at cone 6 or higher, you will save yourself a lot of aggravation by choosing APM elements (see more about APM elements below) which cost more but last much longer with steady performance even at the end of elements' life cycle. Regular elements for a "busy" kiln at medium to high firing range will increase your repair times, repair cost, reduce relays longevity and electric cost. Regular elements start to decay due to corrosion after 60 firings or so (cone 6-10) and will introduce side effects such as longer firing cycle (will effect glazes behavior and sagging kiln shelves due to the longer time required to reach set temperature).
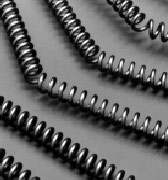
APM is an Advanced Powder Metallurgical, dispersion strengthened, ferritic iron-chromium-aluminium alloy (FeCrAl alloy) which is used at wire temperatures up to 1425°C (2595°F). APM has good hot strength, giving good form stability of the heating elements with less need for element support. It has low tendency to ageing, low resistance change and long element life. PM has an excellent surface oxide, which gives good protection in corrosive atmospheres as well as in atmospheres with high carbon potential, and no scaling. The combination of excellent oxidation properties and form-stability makes the alloy unique.
* If you purchase a kiln with a 3" brick thickens, even though you will lose some inside space, you will save electric cost, your kiln room will be cooler and cooling will be slower (prevents cooling cracks, in particular, with lightly loaded kiln).
* If your operation has only one kiln, purchase spare parts such as elements, relays and thermocouples.
* If you plan to take pots out of the kiln a bit hot (above 150 degrees F), place pots on a wooden surface. Metallic surface will cool the pot's bottom fast and may create cooling cracks in larger flat items. Note however, wood starts to burn at around 400 degrees F.
* Do not store greenware that is not completely dried in kiln room while kiln is operating or room is above normal room temperature - pots will dry too fast and will crack or create stress on the pots which will more likely crack in the firing. Note however, pots that are "almost dry" or "damp" can take advantage of the warm kiln room if they are: 1) Not flat forms, 2) Not very large forms, and 3) Not entered to the kiln room suddenly avoiding rapid drying.
* If you have kiln vent (you really should for quality ware! - more about kiln vents) - make sure the kiln's lid is sealed (often the top kiln brick gets damaged from heavy leaning) and all peepholes are sealed. Often, as the kiln ages, the peephole widens and the plugs are too loose to stay in. We use Ceramic Fiber Blanket to seal the holes.
* Do not try to repair your kiln unless you really know what you are doing. If you decide to repair it (e.g., replacing elements), make sure you have the right tools especially a good pair of crimping pliers. Poor wire crimping might work for a while but with time can create fire.
* Firing tiles and flat forms requires unique steps that can be seen in our making Ceramic Tiles Tips page
Back to
APPENDIX A: What is a Pyrometric Cone?
Pyrometric Cones are small ceramic bars or cones that are created to melt at various temperatures. Pyrometric Cones assure users that their firing process is under control.
Cones measure heat work (the effect of time and temperature). When you want to fire a kiln to a certain temperature, you use a specific cone that will melt near that temperature. The Pyrometric cone is placed near a peep-hole where the potter can see the progress of its melting. Pyrometric cones give you visual assurance that your firing process is consistent day after day after day.
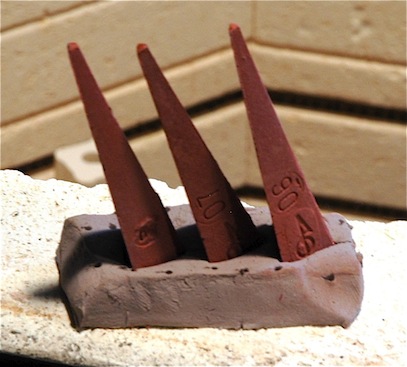
Often, a potter will use a series of three cones of increasing melting point in a row. In this way, the potter can see the progress from cone to cone of the heat work inside the kiln.
Pyrometric cones are labeled with numbers that correspond to their melting points. The number labels can be confusing because some have a leading zero (Cone 010) and some do not (Cone 10). The leading zero can be thought of like a decimal point. The melting point of Pyrometric cones with a leading zero actually decreases as the number increases (Cone 011 has a melting point around 1607 degrees Fahrenheit and Cone 010 has a melting point around 1657). The melting point of Pyrometric cones without a leading zero increases as the number increases (Cone 11 has a melting point around 2345 degrees Fahrenheit and Cone 10 has a melting point around 2345). The melting points for each Pyrometric cone can be seen in the complete Orton Cone Chart below.
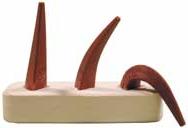
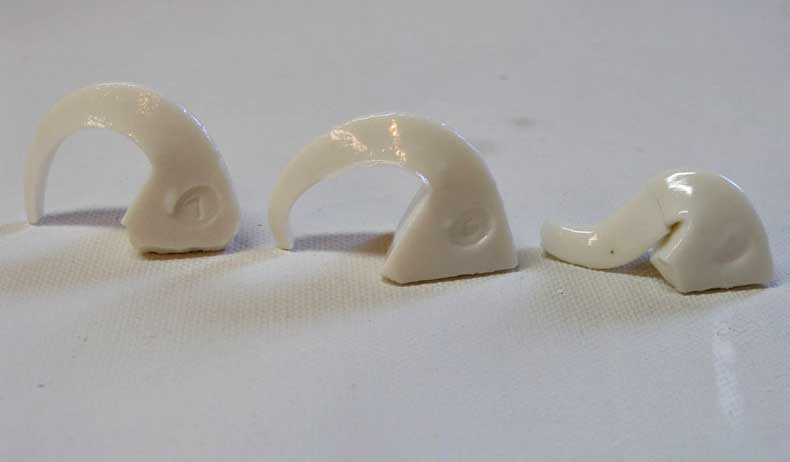
Pyrometric cones come in a variety of shapes and sizes. Bar Pyrometric cones are created in a uniform straight shape. This is for consistent placement in kiln-sitters. Kiln-sitters are devices used inside kilns that hold bar Pyrometric cones. When the cone melts, the kiln-sitter automatically shuts off the kiln.
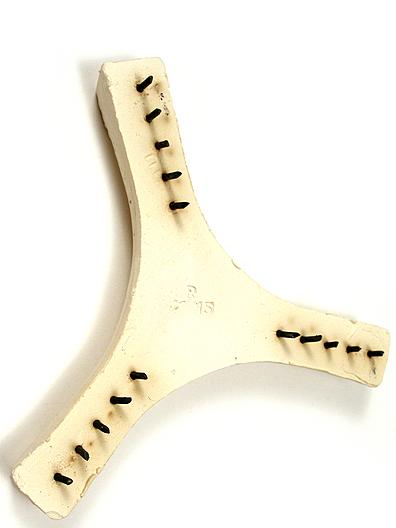
Regular Pyrometric cones cannot stand upright by themselves. They are made to be placed in a pack of clay or a cone plaque to be supported.
Self-Standing or Self-Supporting Pyrometric cones are coned shaped and have extra material at the bottom so that they can stand upright by themselves on a kiln shelf.
Orton is the largest manufacturer of Pyrometric cones. As a result, they set the standard of the heat temperature that each cone represents. The melting point of each Pyrometric cone is shown in the Orton Pyrometric Cone Chart Below.
Orton Pyrometric Cone Chart (Degrees Fahrenheit)
|
Cone Number
|
Self Supporting Cones
|
Normal Large Cones
|
Small Cones
|
|
022
|
1087
|
Not Available
|
1166
|
|
021
|
1112
|
Not Available
|
1189
|
|
020
|
1159
|
Not Available
|
1231
|
|
019
|
1252
|
1249
|
1333
|
|
018
|
1319
|
1314
|
1386
|
|
017
|
1360
|
1357
|
1443
|
|
016
|
1422
|
1416
|
1517
|
|
015
|
1456
|
1450
|
1549
|
|
014
|
1485
|
1485
|
1598
|
|
013
|
1539
|
1539
|
1616
|
|
012
|
1582
|
1576
|
1652
|
|
011
|
1607
|
1603
|
1679
|
|
010
|
1657
|
1648
|
1686
|
|
09
|
1688
|
1683
|
1751
|
|
08
|
1728
|
1728
|
1801
|
|
07
|
1789
|
1783
|
1846
|
|
06
|
1828
|
1823
|
1873
|
|
05 1/2
|
1859
|
1854
|
1909
|
|
05
|
1888
|
1886
|
1944
|
|
04
|
1945
|
1940
|
2008
|
|
03
|
1987
|
1987
|
2068
|
|
02
|
2016
|
2014
|
2098
|
|
01
|
2046
|
2043
|
2152
|
|
1
|
2079
|
2077
|
2163
|
|
2
|
2088
|
2088
|
2174
|
|
3
|
2106
|
2106
|
2185
|
|
4
|
2124
|
2120
|
2208
|
|
5
|
2167
|
2163
|
2230
|
|
5 1/2
|
2197
|
2194
|
Not Available
|
|
6
|
2232
|
2228
|
2291
|
|
7
|
2262
|
2259
|
1307
|
|
8
|
2280
|
2277
|
2372
|
|
9
|
2300
|
2295
|
2403
|
|
10
|
2345
|
2340
|
2426
|
|
11
|
2361
|
2359
|
2437
|
|
12
|
2383
|
2379
|
2471
|
|
13
|
2428
|
2410
|
Not Available
|
|
14
|
2489
|
2530
|
Not Available
|
APPENDIX B - Manual kiln firing example:
(for a bisque firing)
Place a cone 08 into the sitter, and prop the lid open with a 2-3" piece of soft brick. (using a hard post gouges the kiln top surface and lid).
0.00: Put the bottom elements on LOW. Leave the peepholes in (this prevents a chimney effect from cooling the front of the kiln.) Leave the bottom on LOW for 1 hour.
1:00 Put the middle elements on LOW. Now the bottom and middle are both on LOW. Leave the kiln like this for one hour
2:00 hold a small mirror near the front of the open lid. If condensation appears, let the kiln go for another hour. If it does not, drop the lid.
3:00 turn the top element to LOW
4:00 turn all switches 1/3 of the way on (8:00 if you liken it to a clock face)
5:00 turn all the switches to 1/2 on (6:00 on a clock face)
6:00 turn all switches to 3/4 on (3:00 on a clock face)
7:00 turn all switches to HIGH. Dull red heat should begin to appear within the hour. When it does, set the timer on the Kiln Sitter/Timer to 2 hours. The kiln should shut off within that two hour period, most likely before the timer runs out.
This is just an example of a typical firing schedule and may need adjusting at different places depending on your own conditions (e.g., clay and ware types).
Back to top
APPENDIX C - Kiln Room design report -example
To: The (school name omitted)
Subject: School 's Ceramic Studio Recommendations
______________________________________
Dear Ms. (name omitted) T.,
It was a pleasure meeting you and visiting your art facilities on June 1, 2007. As per our discussion, see below a detailed report reflecting the areas where you requested assistance.
Kiln Type, size and kiln furniture:
See link below for all specification issues you need to know (electrical, venting, clearance, etc.) in reference to the kiln. Note that the design needs to satisfy local code fire inspection and your school’s insurance company.
Main specification link which I will refer to later in this report as "LINK 1"
1) Considering the art room size and artwork traffic, I recommend using a “commercial” type kiln where it’s performance and longevity, with low maintenance, is outstanding. The smallest “commercial” kiln type available is 10 cubic feet (28” inside width by 27” deep). Skutt is the leading manufacturer to my opinion and the recommended kiln is model # KM1227PK – 3PH.
2) If the above kiln proposal is too costly, a standard 10 cubic feet kiln, KM-1227-3-3PH, can be selected and will be sufficient.
3) Further cost savings can occur if a smaller, 7 cubic feet kiln, KM-1027-3-3PH, will be selected.
4) Elements: With the KM1227PK – 3PH kiln, you have the option to order what is called APM elements. This will enable you to operate the kiln for years without the need to replace the elements and with consistent firing results. If budget permits, I recommend that you order the kiln with APM elements although standard elements will be satisfactory.
5) Order kiln down-draft-vent model EnviroVent 2. This vent is compatible with all three kilns mentioned above.
6) Recommended kiln shelves: Half shelf x 6
7) Recommended list for kiln posts:
a. ½ ‘ post x 24
b. 1” post x 24
c. 2” post x 12
d. 3” post x 12
e. 4” post x 12
f. 6” post x 12
g. 8” post x 12
h. 10” post x 6
Note: order 1-1/2” triangular kiln posts for better stability if selected a 10 cubic feet kiln. If a 7 cubic feet kiln is selected, 1” square posts will be sufficient and will not take too much kiln space.
8) I do not recommend the use stilts and therefore the top side of kiln shelves needs to be painted with kiln wash -- purchase a bag of 5 lb. which needs to be mixed with water before applying 2-3 layers. Dry slowly before use.
Kiln Room:
1) After reviewing your art room I do not recommend placing the kiln in the art room without an enclosure. Due to safety considerations, the kiln should be enclosed in a dedicated room. This will insure:
a. Access to authorized personnel only
b. Proper room ventilation without fumes traveling to the rest of the building
c. Insulating the kiln room temperature from the rest of the class room preventing work in progress drying too fast
d. Minimize false fire alarms in the art room
2) The width of the specified kiln is 35" (30” for the 7 cubic feet kiln) and 18" clearance is required from each wall. Therefore, the room size is required to be a minimum of 6’ x 6’.
3) To enable adding shelves to store kiln furniture (shelves, posts, stilts), I recommend adding additional 1 ½ feet to one wall making the recommended minimum room size 7 ½’ x 6’.
4) Do not use any flammable materials in the kiln room such as wooden shelves, plastic light cover (florescent light cover can be removed). Floor and walls must be made of fire retardant materials.
5) Door should have a lock with a sign making sure it is known to be a restricted area.
6) Door needs to open outwards away from the kiln
7) A preferred location for the kiln room is along an outside wall for venting pipes easy access.
Kiln and Kiln Room Venting:
1) Room venting must be a separate active venting (fan) takes the room heat directly to the outside. See link below for more details: https://hotkilns.com/btu
2) Kiln Venting must have a direct 3" or 4" pipe (depending on the manufacturer selected). Length can be as great as 60 feet horizontal or vertical with up to four 90 degree bends
3) The recommended kiln room is small and I have concerns about alarm / sprinkler system triggers. In the event of false trigger, a hood can be placed above the kiln to direct all ambient heat directly to the room vent. This can be decided later but a prevision for power is required (115 volt). See this link for a kiln hood details.
4) Inlet air access (a grid) is required to be installed to move fresh air through the kiln area to the outside. Therefore, the location of the room vent and the inlet grid needs to be carefully selected to insure the proper air path.
Kiln Electrical and Alarms:
For electrical specifications for the specified kiln size, click here. For more electrical considerations, see in LINK 1 above.
1) Locate the kiln within 50 feet wire run of your breaker box. For longer runs you will have to increase the size of the hook up wire (must be copper).
2) To make the kiln and it's vents operation "foolproof", I recommend the following:
a. Hard-wire the kiln three phase cord to a switch box
b. Have a disconnect switch-box that with one action connects the power to the kiln, the power to the kiln vent (115 volt) and the power to the room vent. Meaning, the kiln will not run if both fans are not on.
c. Do not place fire alarm or a sprinkler system sensor right above the kiln
3) Place a room thermometer that is visible from door access point
Shelving:
Art room should have shelvings for:
1) Placing class work in progress (projects to be tightly covered)
2) Work ready to be bisqued fired
3) Bisqued work ready for glazing
4) Glazed work ready to be fired
5) Finished work for distribution to students
Firing type:
1) Bisque - cone 06
2) Glaze firing - cone 06 (low fire). This determines that clay and glazes purchased must be cone 06 materials.
3) Preheat all bisque firing for 10 hours at 180 degrees to prevent breakage (the recommended kilns can be programmed for this feature).
4) Avoid mixing bisque with glaze firing even though they get fired to the same temperature. This will prevent glaze contamination and prevent damage to student’s work (one blown up bisque item can send broken pieces around the kiln which will bond to the glazed work).
Ceramic Supply Vendor:
I recommend using NY/NJ Ceramic Supply located in NJ. They have free delivery for purchases over $300. Lakeside Pottery and other entities for which I consulted for are using them reliably. They can be reached at 800-7CERAMIC. Another vendor option in your area is Sheffield Pottery located in Sheffield, MA (888-774-2529). They do charge for delivery. I'll be glad to assist in placing the initial orders.
Clay:
Use a light color clay with or without grog (see below). Light color will show the underglazes much better and the grog content will minimize cracking through the drying/firing process. I recommend using only one type of clay initially.
Clay type: Assuming you will use NY/NJ Ceramic Supply, purchase Standard clay #105 for small projects (has no grog - easier to work with), #105G for larger project (has grog but rougher on the hands)
Glazes:
I recommend using only underglazes that can be used with clear glaze over for luster.
Costs:
All cost are approximate and it is possible to negotiate a better price.
1) KM1227PK–3PH: $3,200
2) APM Elements option for KM1227PK-3PH: $750
3) KM1227-3– 3PH: $3,000
4) KM1027-3–3PH: $2,500
5) Kiln furniture (shelves and posts): $450 - $600
6) EnviroVent 2: $475
7) Brent CXC wheel: $1,500
--------------------------------------------
Rest of report is omitted - not kiln related (e.g., materials, tools, equipment, teaching curriculum)
----------------------------------------------
|