To make a tray with beautiful impressions quickly and accurately that can be handled by children (age 8 and older) and adults. This is a great project to demonstrate to students how beautiful pottery can look with very little effort. It provides the basic understanding of how clay feels like, use of tools to cut clay to size and give surface texture. Lakeside Pottery use this project to provide instant gratification in the first class or two where it increases self confidence and interest to learn more about pottery.
What is needed:
1) Slab of clay ¼" thick. Dimensions depending on size of tray
2) Pin tool
3) Window wipe
4) Stamps
5) Rolling pin
6) Leaves /plants
7) Newspaper
8) WD-40 lubricant
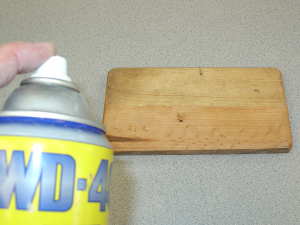
9) Piece of wood to reflect the inside surface size of the tray. The corners of the bottom surface of the wood need to be rounded slightly to prevent from cutting into the clay slab.
10) Foam larger than the total size of the tray and about 2 1/2" - 3" thick.
Step by step:
1) Use a slab roller or rolling pin to flatten the clay to about ¼" thick.
2) Place the slab on one sheet of newspaper.
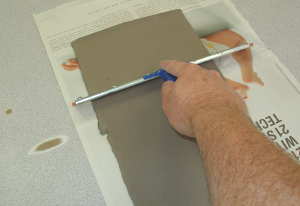
3) Smooth the surface of the slab with a window wipe or a metal pottery kidney.
4) Spray WD-40 (or any other lubricant) on the bottom part of the wood.
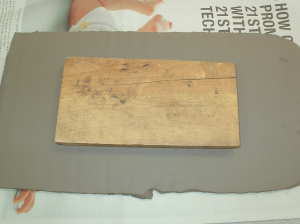
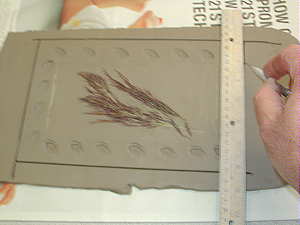
5) Mark the inner part of the tray on the clay using the piece of wood as an outline.
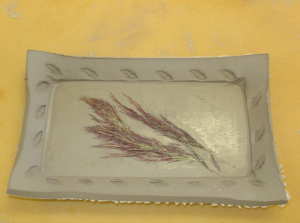
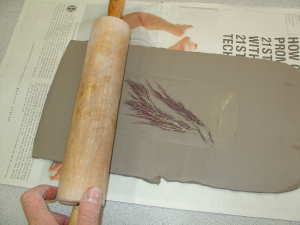
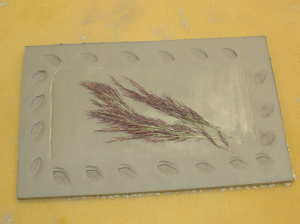
6) Place leaves or such on the middle section of the tray and push into the clay with the rolling pin.
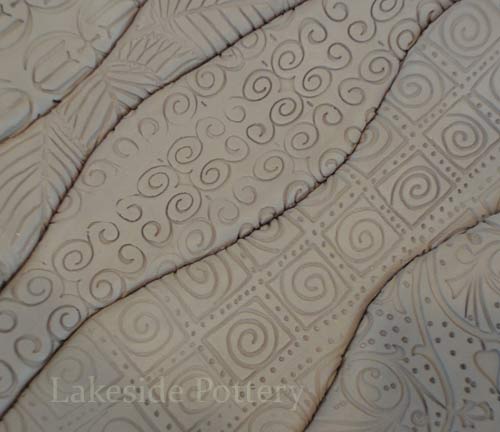
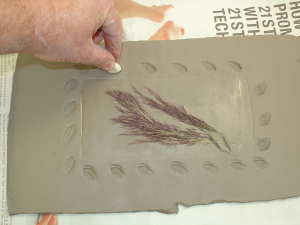
7) Decorate what will be the rim of the tray with stamps or other means.
8) Cut the slab of clay to about 1" - 1 1/2" from the outline marked previously. The 1" - 1 1/2" size will be the tray's rim.
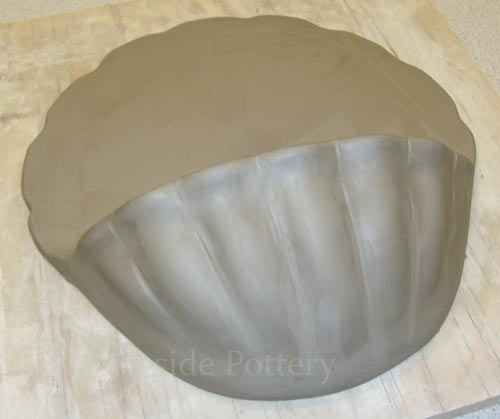
9) Move the slab with the newspaper to the top surface of the foam.
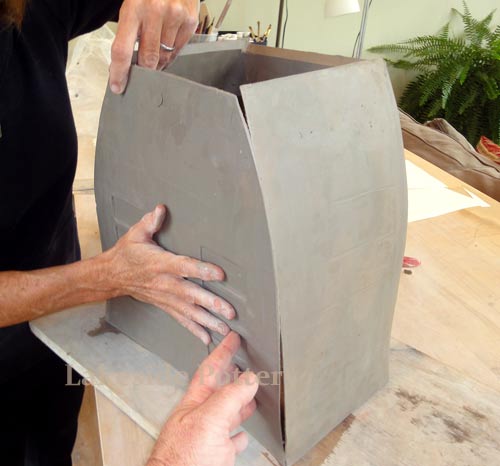
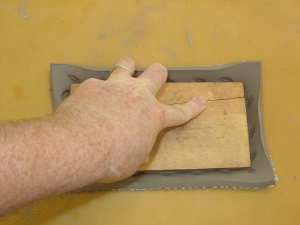
10) Place the piece of wood in the center of the slab (note that if the outside dimensions of the tray are 8"x12", the piece of wood need to be approx. 6"x10"). Make sure you place the lubricated side of the wood with the rounded corners on to the clay.
11) Push the wood onto the clay until the rime of the tray erects to the desired angle. Than let go. The tray is now formed.
12) Use the pin tool carefully to remove the wood from the clay by lifting one corner first.
13) Let tray dry and bisque.
14) Glaze and place the glass where desired (if using cone 6 electric firing).