To start, make sure that your glaze is sieved, thoroughly stirred up and set up to the proper consistency. For information in this area, see the glaze techniques page.) You may want to prepare some sample pieces for evaluating your application thickness.
Dipping Mugs and Bowls

Try to locate the tongs near the top weld of the handle. This can keep tong marks from being readily apparent on the fired piece. Place the vertical tines of the tongs on the outside of pieces - this too will minimize the appearance of tong marks.
1. Dip the mug into the glaze slop almost as if the mug were a ladle. If you plunge the mug straight downwards, it will cause glaze to splash back at you - this can be messy and a pain if you get glaze in your eyes!
2. Hold the mug in the glaze for 2 to 5 seconds (this time can vary for different glaze setups).
3. Remove the mug from the glaze, reversing the process in step 1. The key here is to minimize splashing.
4. Hold the tongs upright, so that the mug is upside down and directly above your glaze bucket.
5. Pivot the tongs in a circular motion so the wet glaze around the rim does not gather in a particular area. Shake the piece gently to make excess glaze run off and the glaze coating to smooth out.
6. When the rim has lost its wet sheen, set the mug down in an upright position.
7. Inspect the piece, does the glaze coat appear smooth? Any visible drips may show up as drips on the fired piece. Drips can indicate that the glaze setup is not quite right or that the piece was set down before it was dry enough.
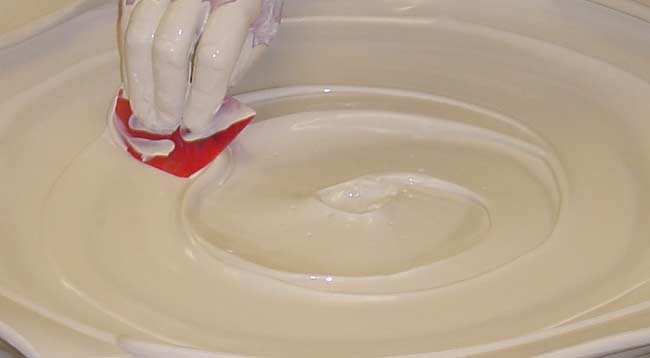
Glazing flat items using tongs.

1. Slide the plate into the glaze slop rim first to prevent splashing.
2. Hold the plate in the glaze for 2-5 seconds.
3. Remove the plate holding it in a vertical position and shake the excess glaze off the piece.
4. Set the plate down once it has lost its wet sheen.
5. If necessary, smooth the tong marks with a brush or Q-tip.
Glazing vases and other tall narrow cylinders.
What do you do when you have a vase that is 12” tall, but only 8” depth of glaze?

1. Holding the vase by the bottom, dip it rim first into the glaze one third to one half way in.
2. In a quick motion, push the vase straight down and then snap it back up but not out of the glaze. You should hear a burping sound - this is the sound of the interior of the vase being glazed.
3. Remove the piece from the glaze and allow it to dry just until it loses its wet sheen. Check the inside to make sure the glaze has covered the inside.
4. Turn the piece over, hold the neck/rim area using the tongs and plunge it foot first into the glaze. Dip it so there is a slight overlap of the area that you glazed in step 1. Remove the piece and set it down to dry.
These are just a few dipping techniques. Of course, dipping can be combined with other application techniques. For instance, colored glazes can be brushed, poured or sprayed over a dipped glaze surface.