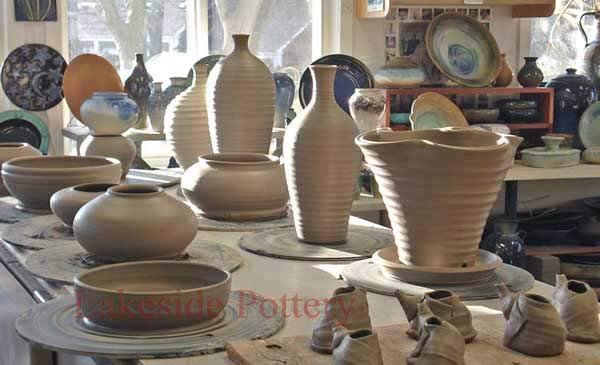
Overview
A lot of people asked us about wedging tables and plaster molds / casts. This page will focus on building wedging tables but also will answer a lot of questions about making plaster molds and plaster surfaces for recycling clay. We use our wedging tables constantly 5-7 days a week and have to replace them approximately every four years. Being that we cannot afford down time waiting for the plaster to dry properly for a week or two, we build only the wedging board of the table with plaster a head of time. When replacements are needed, we "hot swap" the old with new within minutes (four screws attaching the wedging board to the table) and are ready to be used instantly.
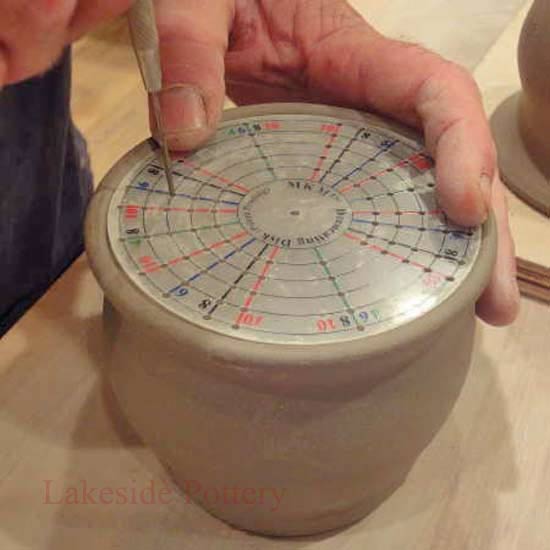
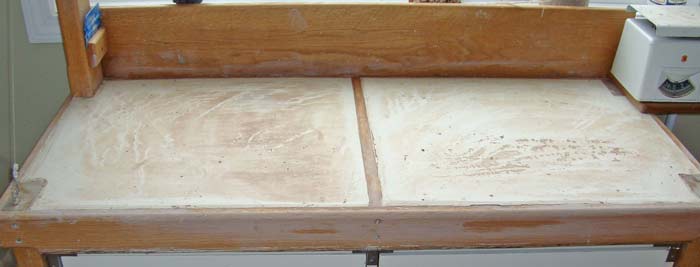
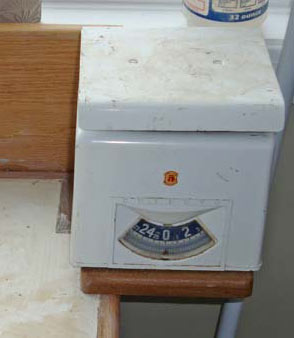
The table where clay is kneaded must be sturdy and may benefit from being screwed to the wall or to the floor. Other design considerations include: Comfortable height (30 -32"), absorbent surface, cutting wire, and sufficient space to set scale. Some potters use the wedging table to dry recycled clay.
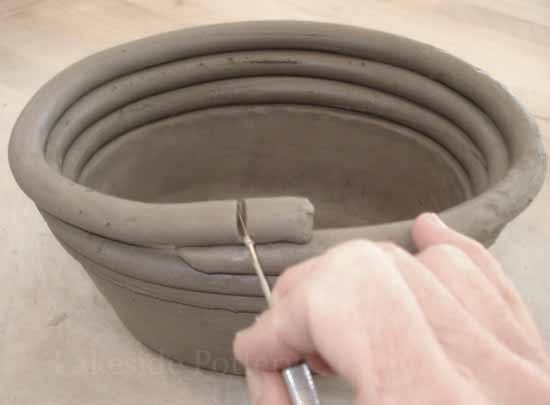
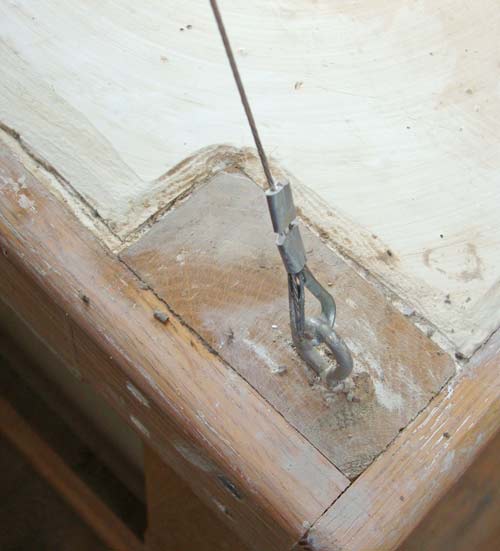
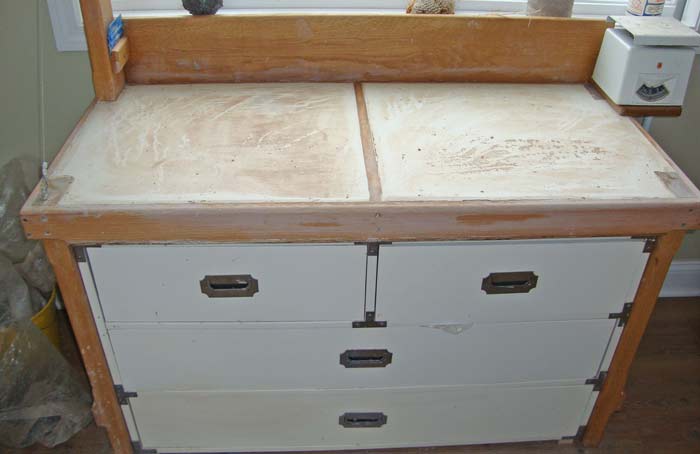
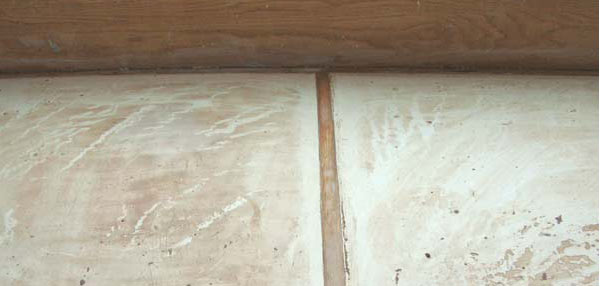
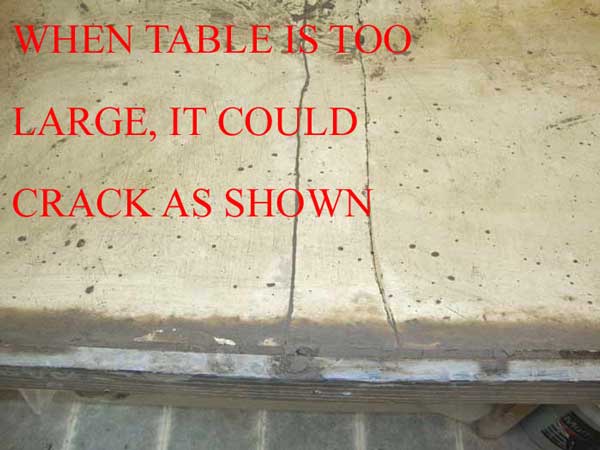
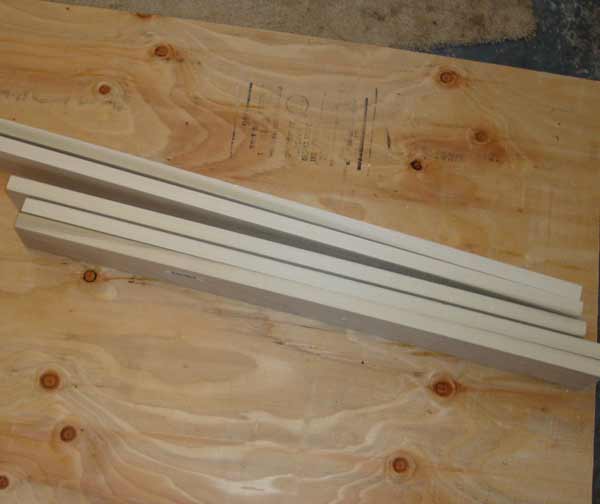
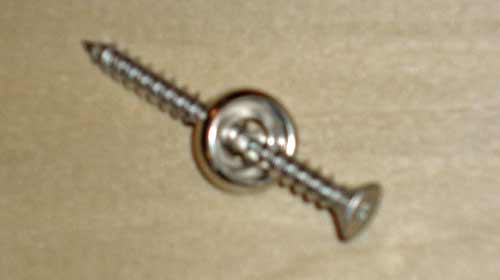
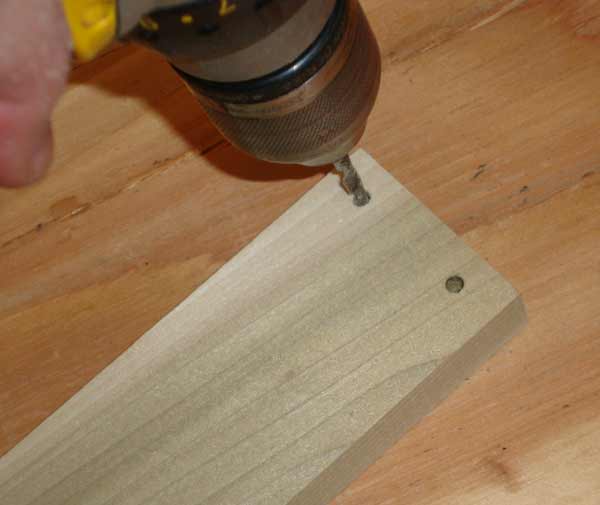
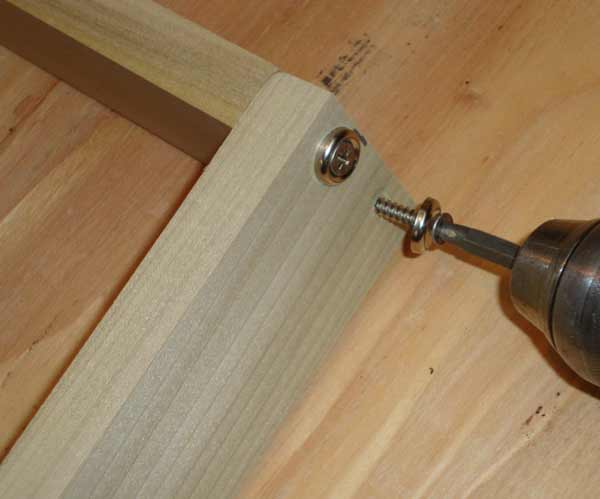
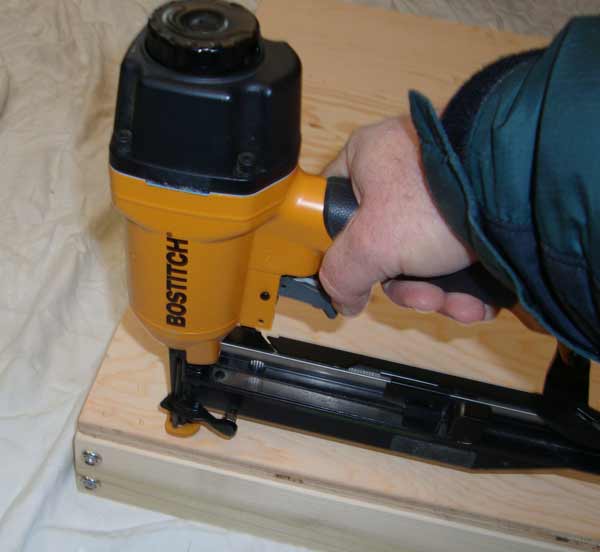
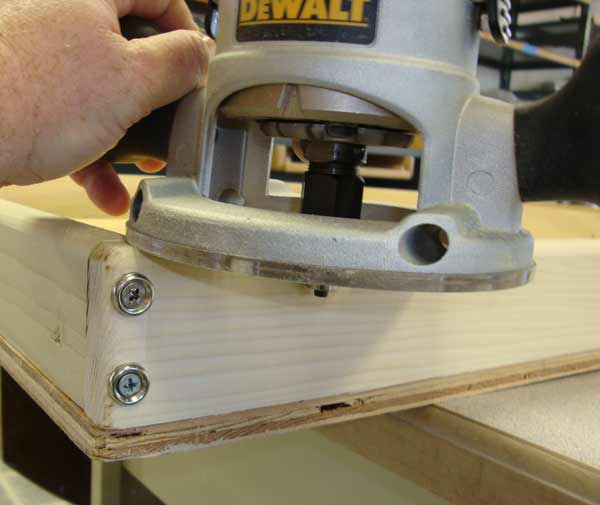
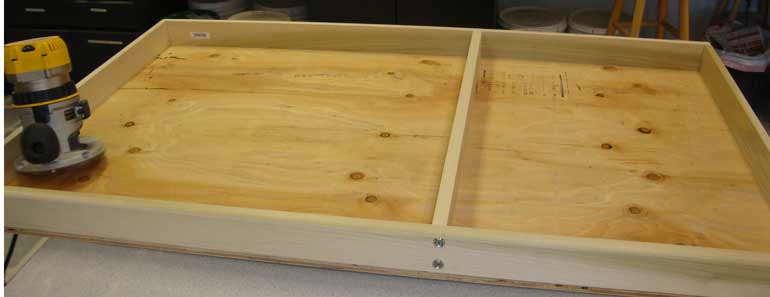
Wedging table wood frame: For our wedging or clay drying tables, we built a wooden frame (3/4" hardwood)** 2" - 2 1/2" deep with a bottom made out of 1/2" plywood. We use hard wood to avoid warping and ensure that the screws that hold the frame together are not pulled out with the plaster tension. Stainless steel screws are preferred and will last longer (wood will be wet for the majority of it's lifetime). The plaster we used is "No.1 Potter's Plaster" that comes in 50 Lb. bags. A 50 Lb. bag fills up 1,150 cubic inches. For example; a frame 2' x 2' at 2" deep will add up to 1,152 cubic inches. If the depth is increased to 2 1/2", you'll need 1,440 cubic inches and therefore one 50 LB. bag will not be sufficient. See more details below. A frame section should not be larger than 30" x 30" surface area. Larger sections are more prone to cracking as illustrated in one of the pictures on the right. Note that the bigger the wedging table, the more you have to be aware of how far you have to carry it when dry and ready for use - it gets really heavy!!
** Poplar is one of the less expensive hardwoods which we have used successfully
Pottery plaster must have correct water / plaster ratio, mixed / poured properly and with precise timing. Therefore, the instructions and the data below are important for the quality of the mold and it's longevity.
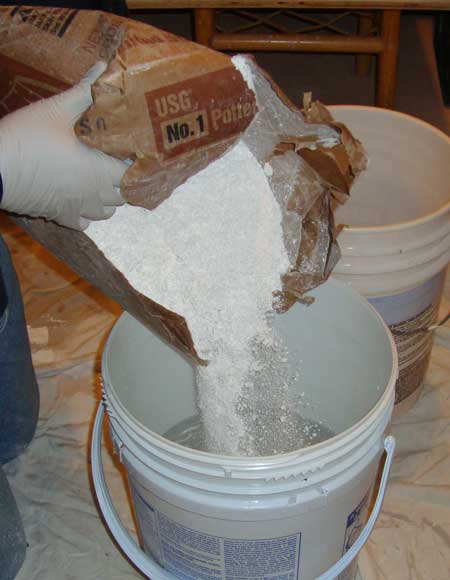
Proper plaster selection is essential. For wedging tables, we recommend using USG No. 1 Pottery Plaster (comes in 50lb Bags). #1 Pottery Plaster is highly uniform, noted for outstanding performance and long life. The standard of the industry - this is the best material available for sanitaryware and dinnerware casting. Used for making plaster bats, wedging boards, and working molds. This is a relatively soft plaster which may be used for carving.
Pottery Plaster Regular is 25% softer than No.1 Pottery Plaster and therefore will have shorter life if used as a wedging table but it is 12% better at absorbing water and will perform better if used to make surfaces for drying recycled clay. See more data in Appendix 3 below
Note: Wedging tables larger than 30" x 30" might crack with time and a divider is recommended (see pictures on right).
General Directions and Guidelines - Plaster Molding
Use only clean tap water or distilled water. Metallic salts, such as aluminum sulfate, can accelerate the setting time, and soluble salts can cause efflorescence on the mold surface. Variations in water temperature will affect setting time and can cause difficulty in the control of mixing time. The water you use should be at room temperature or 70°F (21°C). If the water is too warm, the plaster will set too fast, and vice versa.
Use fresh plaster. Plaster is calcined, meaning chemically bound water has been driven off through heating. If the plaster has been sitting around in a damp environment, it will have lumps in it, in which case it is no longer usable. Pitch it. Use plaster that has been stored dry and is lump free.
Weigh out materials. Do not guess about the amounts of plaster and water you'll need. Once you start the mixing process, you do not want to go back and adjust the quantities.
When using Pottery Plaster No. 1, mix 70 parts of water to 100 parts plaster. This equals 4.17 gallons of water per 50 pounds of dry pottery plaster. (When using Pottery Plaster Regular, the ration is 74 parts water to 100 parts plaster).
To simplify the above, below are some easy ratios to apply to any wedging table or mold size needed. Also, see table 1 below for a range of selected volume.
To determine the amount of water you need, estimate the wedging table volume in cubic inches, then divide by 276 to give the gallon of water.
To determine the weight of Plaster No.1 needed, estimate the wedging table volume in cubic inches then divide by 23 to give plaster's weight in Lbs.
Table 1 - Water to Plaster Mixing Chart
|
Water (Gallons)
|
No. 1 Pottery Plaster (lb.) |
End Product Volume (Cub. inch.)
|
|
8.34
|
100
|
2300
|
|
4.17
|
50
|
1150
|
|
3.75
|
45
|
1035
|
|
3.34
|
40
|
920
|
|
2.92
|
35
|
805
|
|
2.5
|
30
|
690
|
|
2.09
|
25
|
575
|
|
1.67
|
20
|
460
|
|
1.25
|
15
|
345
|
|
0.83
|
10
|
230
|
|
0.42
|
5
|
115
|
|
0.25 (2 pints)
|
3
|
69
|
|
0.16 (21.4 oz.)
|
2
|
46
|
|
0.08 (10.7 Oz.)
|
1
|
23
|
The above table is based on USG® No. 1 Pottery Plaster mixed to a consistency of 70 (70 parts water to 100 parts plaster) recommended for most studio applications. Excessive water yields a more porous but more brittle mold, and less water means a very dense, hard mold that will not absorb water.
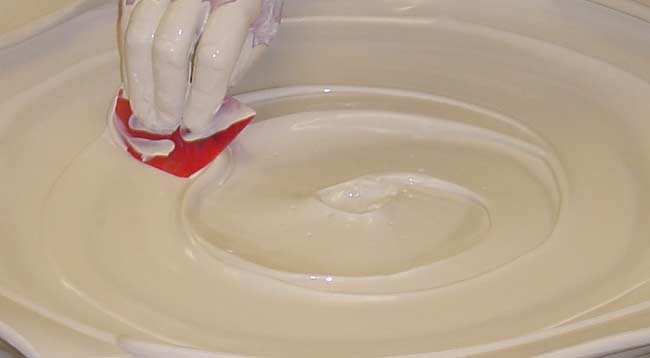
Add plaster to water. Slowly sift the plaster onto the surface of the water. Do not dump the plaster or toss it in by handfuls. Adding the plaster shouldn't take more than 3 minutes.
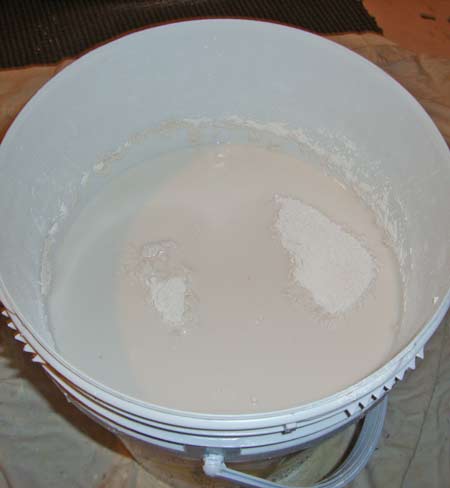
Soak the plaster. It is important to let the plaster slake. Slaking is the process of leaving the plaster in the bucket with the water to let the plaster itself eliminate air bubbles by soaking. I would usually wait 3-4 minutes depending on the water temperature. The soaking allows each plaster crystal to be completely surrounded by water and it removes air from the mix. Small batches require less soaking than large batches. If the soaking time is too short, it may contribute to pinholes; and if it is too long, it will contribute to fast set times, early stiffening and gritty surfaces.
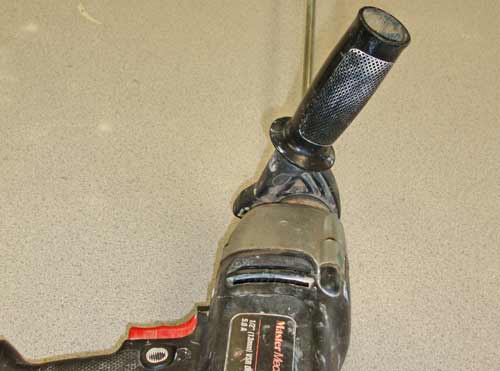
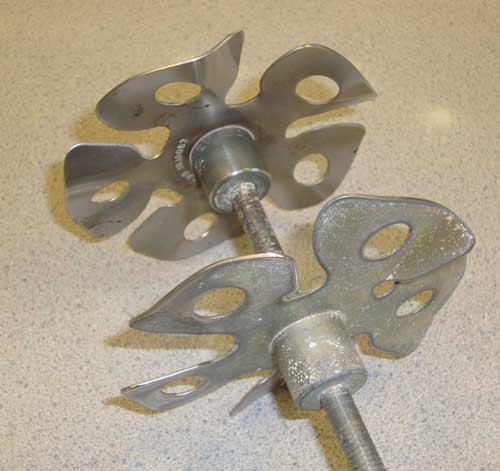
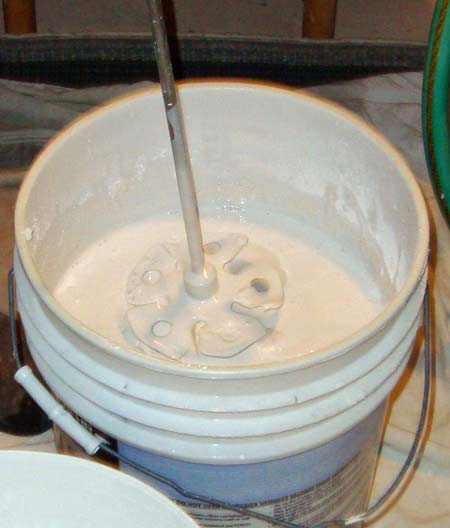
Mix the plaster. Mixing the plaster slurry is the most important step in producing plaster molds or casts with maximum strength, absorption, hardness and other important properties. Changes in mixing procedures will have a great effect on the finished product. The basic objective is to uniformly and simultaneously wet each particle as best as practical. Where to purchase mixing blade
When plaster is wet, a chemical reaction is occurring which produces heat. Protect your hands with gloves. Set-up time is affected by water-to-plaster ratio (less water = faster set-up but decreased strength). Temperature of water (warm = faster set-up), and speed and length of mixing (long/rough agitation = faster set-up). Set-up should be at room temperature without fans or drafts. To facilitate clean up, the mixing container may be treated with WD-40 or other release agents. Use a constant motion with your hand and you will notice a change in consistency from watery to a thick cream. Breakdown lumps with your fingers as you mix. Mix only for a minute or two being very careful not to agitate the mixture so much that air bubbles are incorporated into the mix. Mixing time affects absorption rates longer mixing times produce tighter and less-absorptive molds.
Manual Mixing (not generally suitable for batches over 5 pounds) - using a spoon or wood trowel, mix from the bottom using a side to side motion. Circular motion will cause bubbles. Mix to the consistency of heavy cream.
Electric Mixer - Use an electric drill with a "Jiffy Mixer" or equivalent attachment. "Stir" at no more than 1750 RPM while holding the Jiffy Mixer at 15 degrees off vertical.
The mixing container should be solidly tapped or even dropped on the floor several times to help air bubbles rise to the top.
The plaster is ready to pour when mixing is complete. " Marking" is a way to determine when it is ready - when a finger is trailed over the surface of the plaster and a slight mark is left in the plaster.
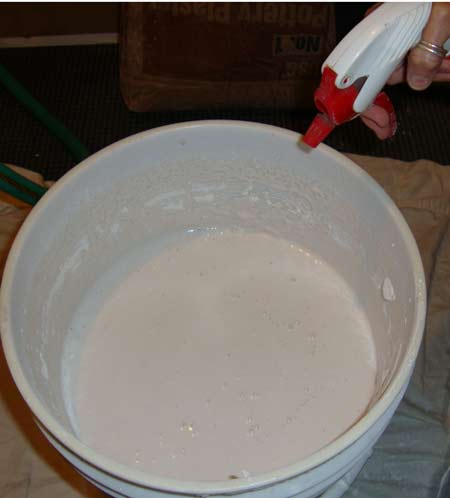
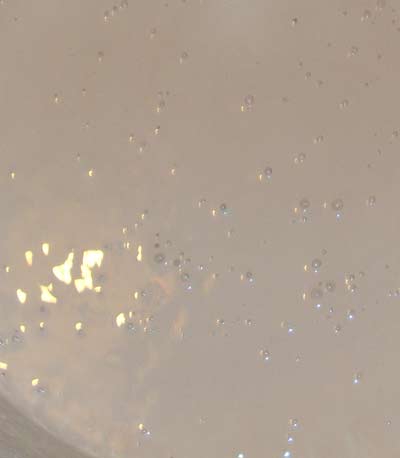
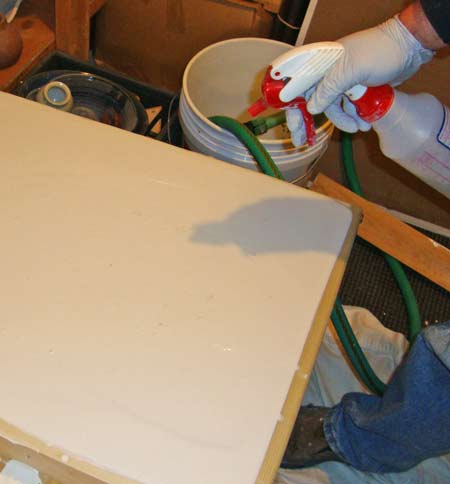
Air bubbles Use Isopropyl alcohol (rubbing alcohol) in an old spray bottle. When the time is nearing completion for mixing shoot in a couple of spray bursts. This has the effect of breaking the surface tension of the bubbles at the surface and you'll see them disappear.
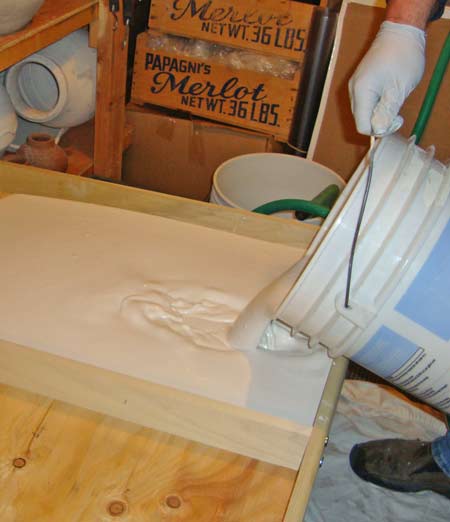
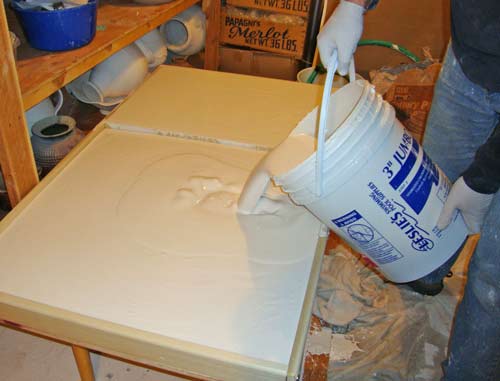
Pouring the mix. Pouring should be done in a comfortably quick, smooth, steady manner directed towards the center of the base of the wedging board frame. Shake the table with and pour into a corner of the wooden frame cavity that will not be threatened as much by bubbles that don't make it up in the shaking process. After the pour is made shaking the table a little more sharply and/or vigorously will help bubbles up. After the pour, another spritz of Isopropyl will help eliminate surface bubbles again.
If water rises to the surface after the pour, the plaster has not mixed sufficiently or the water to plaster ratio is incorrect. Mix longer, check your calculations or review the ratio.
- Batch size should allow for the pouring to be completed within 5 minutes after the slurry has been mixed.
- If strength is the most important factor, longer mixing times are suggested, taking care not to over mix into the setting action of the plaster, which decreases strength.
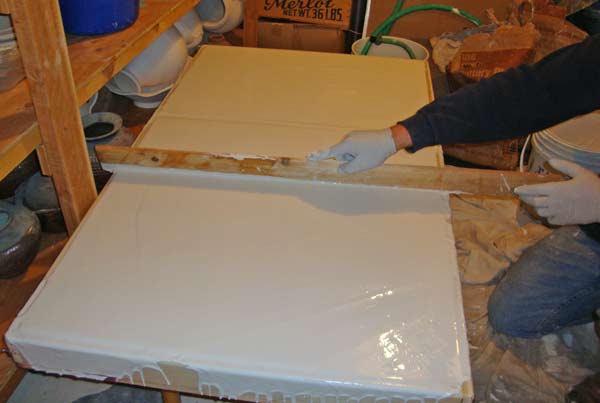
Clean up. It is much easier to clean wedging table frame, tools and floor from plaster spills and over flaw within the plaster's curing time (15-20 minutes). Do so with damp rags. If you miss this window of opportunity, you'll have to deal with scraping and sanding. Bucket can be cleaned the next day when the plaster is cure by taping on the bucket letting the dry plaster break off the walls.
Drying time. Depends on air humidity, newly made wedging table should not be used for 2-3 weeks to let the plaster dry completely before use. Drying time may vary depending on environment's humidity.
Safety and environmental concerns - When mixed with water, this material hardens and becomes very hot - sometimes quickly. DO NOT attempt to make a cast enclosing any part of the body using this material. Control and suppress dust formation, prevent powder or slurry contaminating drains and watercourses. Minimize and control dust when opening bags, mixing powder with water or sanding set plasters. Avoid prolonged or repeated contact with the skin or any eye contact. Wear protective clothing and gloves when mixing or working with powdered or wet plasters. If plaster contact or splashes are likely wear safety goggles. Gypsum based preparations are not known to have high potential to damage the environment. No known available evidence indicating adverse toxicological health effects for acute toxicity, corrosivity/irritation, sensitization, repeated-dose toxicity, mutagenicity, carcinogenicity, or reproductive toxicity. Inhalation – Plaster dust may irritate respiratory system, no known long term effects. Ingestion- Small amounts of plaster or wet mix should not cause any significant reaction or long term effect. Skin contact- Plaster powder may dry skin leading to irritation if contact is prolonged or skin is sensitive. Eye contact – Powder or wet mix splashes may irritate by particulate in the short term.
APPENDIX 1 - What is Plaster?
Plaster is a relatively harmless dry powder made from Gypsum Rock (calcium sulphate) CaSO4 2H2O.
The mineral Gypsum is commonly found throughout the world. There are vast deposits in the United States and Canada .Gypsum is white or pale grey in color and occurs in sedimentary beds or veins. Veins of Gypsum range in thickness from a few feet to 30 feet thick. Gypsum rock is 2 in the hardness scale, it can be scratched with the fingernail. It has a wide range of uses. As a product called Snow White filler it is approved for food and drug use. It is used in plastics where finesse/whiteness are most critical. Gypsum as Terra Alba is used in flour, baking powder, pills and breweries. It 's uses as a building material and as a craft material are well known.
Plasters and their harder brethren, gypsum cements, are manufactured from naturally occurring, high-purity gypsum deposits. The gypsum is finely ground and the chemically-bound water is then removed through one of two calcination processes depending upon the type of plaster desired. The calcination process is one of heating the finely ground material which removes the chemically-bound water which then results in a different independent crystalline structure. The manufacturer controls the process to achieve different size and shape crystals which then results in different final characteristics. The term "gypsum cement" refers to harder and higher strength plasters manufactured by using heat and pressure. Industrial plasters require 65-160 lbs. of water to 100 lbs. of plaster to make a workable slurry whereas gypsum cements require 22-45 lbs. water to gain workability. With the reintroduction of water to any plaster, a new interlocking structure of needle-like crystals forms. This is a very complex process with many variables affecting the outcome from the grinding and calcination process to the reintroduction of water. Each step is critical to achieving the desired end product.
The general characteristics of plasters are:
Ease and variety of uses
Mixed as a fluid slurry, it can be cast or sprayed
Worked in a plastic state by screening, template forming or paddling
As a semi-moist powder pressed between dies
As a solid carved or machined
Homogeneity with no grain, hard or soft spots
Expansion from close to zero to 3/16 inch per foot
Setting time from 3 minutes to 20 hours
Strength and hardness from the weakest chalk to four times greater than concrete
Absorption from that of a rigid sponge to an impervious surface that sheds water
Density from that of popcorn to stone
Compatible with other chemicals, aggregates, colorants
Fire resistant and electrically non-conductive
Non-toxic, non-allergenic, odorless & non-irritating to the skin with few exceptions
Dimensionally stable under normal changes in temperature and humidity
Extreme accuracy in reproduction
In addition, new plaster adheres to old plaster, especially if the old plaster is moistened and roughened. The bonded surface will be harder, however, which may be undesirable (on a mold, for instance)
Plaster goes through several setting stages after it is mixed with water. Different plasters and mixing procedures affect the time of each stage:
1-Liquid stage
2-Plastic stage. This is the "workable" stage when the plaster can be manipulated as desired. It can be hand modeled, paddled or carved to desired shapes and forms.
3-Final setup. This is when final crystallization takes place and heat is generated
Plaster types and Uses
It is very important to use the proper plaster or gypsum cement for the specific application and it is important that it be fresh and mixed properly. "Plaster of Paris" from your home supply store is not suitable for most ceramic applications as it may lack the strength, hardness, absorption and/or structural integrity needed. The shelf-life of quality plasters is approximately 6 months. It must be kept dry, preferably in a sealed container off the floor (it will start to "set" just by picking up moisture from the air). Also, it is a powerful flux at high temperatures, so be very careful to avoid any contamination of clay with even a small amount of plaster. Plaster pieces are generally not suitable for applications exposed to water such as fountains or outdoors. All are very fine plasters and pick up detail very well.
APPENDIX 2
How Many Kinds of Plaster are There
US Gypsum Casting Materials and Other Plasters:
#1 CASTING PLASTER - Similar to white art plaster, except mixed at a lower use consistency to increase strength, chip-resistant, and to further minimize paint absorption.
#1 MOULDING PLASTER - Often referred to as “plaster of paris” or soft plaster. Used for waste molds or temporary patterns where surface hardness and strength are not important. Screeds well under template.
POTTERY PLASTER REGULAR - General purpose product recommended for most slip casting applications in the ceramic industry. More fragile and softer than #1 Pottery Plaster.
Technical data:
Use Consistency (parts of water by weight per 100 parts plaster) = 74
1 Hr. Compressive Strength = 850 psi
Dry Compressive Strength = 1,800 psi
Total Absorption Capacity = 41%
Maximum Setting Expansion 0.190% 0.190%
Density Wet = 97.6 lb/ft3
Dry = 66.0 lb/ft3
Set Time (Machine Mix) = 14-24 min.
No.1 POTTERY PLASTER - Highly uniform, noted for outstanding performance and long life. The standard of the industry - this is the best material available for sanitaryware and dinnerware casting. Used for making plaster bats, wedging boards, and working molds. This is a relatively soft plaster which may be used for carving.
Technical Data:
Use Consistency (parts of water by weight per 100 parts plaster) = 70
1 Hr. Compressive Strength = 1,000 psi
Dry Compressive Strength = 2,400 psi
Total Absorption Capacity = 36%
Maximum Setting Expansion = 0.210%
Density Wet = 99.0 lb/ft3
Dry = 69.0 lb/ft3
Set Time (Machine Mix) = 14-24 min.
CERAMI-CAL - A low-consistency form of HYDROCAL Gypsum cement compounded to produce a dense, smoot- wearing die material for pressing clayware. Characterized by low absorption, high strength, ability to purge easily, and resistance to abrasion and wear. Specifically for use with the RAM automatic clay-forming process. Available in regular and export bags.
DRYSTONE - Fast setting high strength product that needs no drying. An environmentally sound alternative to resin-based products. No hazardous chemicals or waste, no styrene emissions and no required environmental controls.
DURAMOLD - Created to meet the demanding needs of the slip casting industry. Compared to #1 POTTERY PLASTER, DURAMOLD features longer mold life and higher wet and dry compressive strength.
FAST CAST - A fast-setting grey cementitious product for casting freestanding outdoor statuary and figurines. Can be demolded one hour after set, allowing much higher production rates than conventional cements. Designed to be mixed with sand - consult product literature for additional information.
GARDENCAST - Similar to FAST CAST except a white-colored product to be used with white sand. Consult product literature for additional information.
HYDROCAL FGR 95 - Unique, high-strength gypsum cement for use with glass fiber for fabricating glass-reinforced gypsum cement products.
HYDROPERM - A specially formulated product incorporating an airentraining agent to provide permeability. For producing permeable plaster molds for precision casting of many nonferrous metals and alloys.
HYDRO-STONE - One of the hardest and strongest of all gypsum cements. When mixed properly, has a heavy, syrupy consistency ideal for pouring solid models or patterns. Recommended for stretch-press dies where extreme surface hardness is required. Slightly higher setting and expansion than ULTRACAL 30. Used for high quality art novelty and statuary castings.
PURITAN POTTERY PLASTER - Unique, specially designed for use with mechanical clay forming machinery. Absolutely the hardest, most wear-resistant plaster made for molds, and a favorite for jiggering molds.
STATUARY HYDROCAL - A basic HYDROCAL cement with a lower use consistency of about 40 lbs. of water per 100 lbs. of plaster. Extremely hard and strong with improved plasticity. Designed for solid and hollow art casting.
TUF CAL - A polymer modified, high early strength, fibered plaster that has been specifically designed for all statuary applications where greater resiliency and chip resistance is desired. Can be slush cast as well as solid cast. Mechanical mixing is required for best results.
TUF STONE - Designed for solid casting with much higher impact-and chip-resistance. Polymer modified and fibered for much higher resilience.
WHITE HYDROCAL - Used for making plaster objects, a neutral gypsum cement having a normal set of 25 minutes. When formed under a template it is slightly on the “short side” and has a tendency to tear. The setting expansion is somewhat greater than ULTRACAL 30.
ULTRACAL 30 - This is a low-absorption gypsum cement for case molds. Specially made for close-tolerance tooling - provides the greatest hardness, accuracy and freedom from efflorescence of any gypsum cement on the market. Recommended where extreme accuracy and greater surface hardness are required, as in duplicator models. It has the lowest expansion of any rapid-setting gypsum cement available. Has a gradual set and long period of plasticity.
ULTRACAL 60 - Similar in all respects to ULTRACAL 30 except that it sets in about one hour. Designed for very large models where additional working time and the highest possible degree of accuracy are required.
Sources: Lakeside Pottery, United States Gypsum (USG) Company and Clay: A Studio Handbook, by Vince Pitelka, published by The American Ceramic Society, 2001 and more.
Tags: Wedging Table, Making Ceramic Molds, Plaster
|